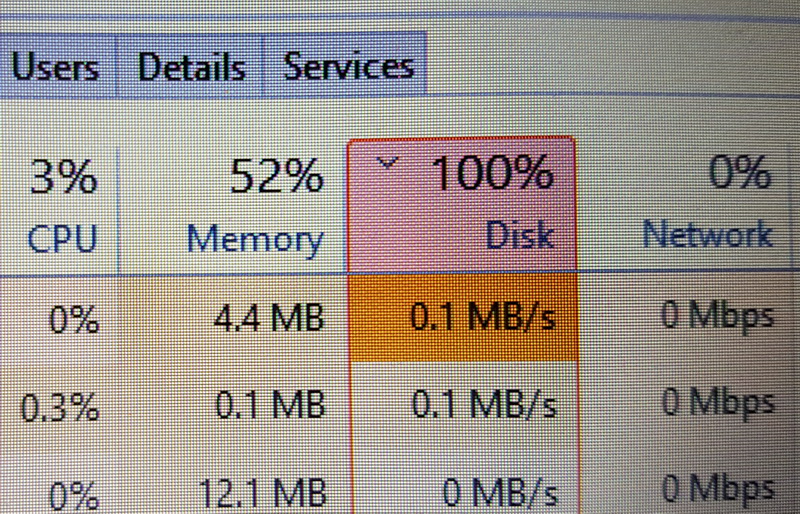
 Several people are experiencing a painstakingly slow computer after the latest upgrade to Windows 10. When looking in the task manager they find that the disk usage is "stuck" at 100% even though hardly any processes are running.
If you are experiencing something similar, then simply press "ctrl-alt-delete" and then open the Task Manager to view if this the problem on your computer as well.
There are many things that could cause this problem, but in my experience most cases are solved with these three remedies:
1) Stop and Disable "Windows Search" in services.msc
a) Click search icon or click on the windows log in your bottom left corner.
b) Write in "services.msc" and then click enter to open Services.
c) Locate "Windows Search"
d) Rightclick "Windows Search"and then leftclick on "Properties".
e) Change "Startup Type" to Disabled
f) Stop the service
g) Click "apply" and "Ok"
2) Stop and Disable "Superfetch" in services.msc
a) Click search icon or click on the windows log in your bottom left corner.
b) Write in "services.msc" and then click enter to open Services.
c) Locate "Superfetch"
d) Rightclick "Superfetch" and then leftclick on "Properties".
e) Change "Startup Type" to Disabled
f) Stop the service
g) Click "apply" and "Ok"
UPDATE 11/12/2019:
After Microsoft released Windows version 1809 the superfetch service was renamed to SysMain.
If you previously disabled Superfetch as per above, then please note that this deactivation is now gone, and the replacement SysMain, is now active and enabled, and might cause problems for you.
You therefore have to go through the steps again, and this time deactivate the service called SysMain.
Finally, I after deactivating Superfetch/SysMain I will recommend you to reboot the computer a couple of times to check if this has solved your problem.
If the problem still exist, then go to the next step below.
3) Stop and Disable "BITS - Background Intelligent Transfer Service" in services.msc
a) Click search icon or click on the windows log in your bottom left corner.
b) Write in "services.msc" and then click enter to open Services.
c) Locate "Background Intelligent Transfer Service"
d) Rightclick "Windows Search"and then leftclick on "Properties".
e) Change "Startup Type" to Disabled
f) Stop the service
g) Click "apply" and "Ok"
4) Change Page File Sizes
a) Click search icon or click on the windows log in your bottom left corner.
b) Write in "control panel" and then click enter to open the old fashioned Control Panel from previous version of Windows.
c) Click on "System".
d) Click on "Advanced System Settings" on the left.
e) Click on "Settings" in the Performance box.
f) Click on "Advanced" tab.
g) Click on "Change" in the Virtual Memory Box.
h) Click on "Custom Size"
i) You will now have two boxes to fill. (Initial Size, and Maximum Size)
What you insert here is depending on the amount of RAM you have on your computer.
If you e.g. have 4GB of Ram, then you need to insert 4 x 1024 = 4096 (in the initial size box), and then double that at 8192 in the Maximum Size box.
If you e.g. have 8GB of Ram, then you need to insert 8 x 1024 = 8192 (in the initial size box), and then double that at 16384 in the Maximum Size box.
j) When you have inserted your values, then click "Set", and finally click "OK"
k) Click "OK" on the next couple of boxes to close these.
l) Reboot the computer.
When the computer now start up again, the problem is hopefully fixed.
(Sometimes, I find that all these measures only kick in after 2-3 reboots. Not sure why, but think it must be some sort of queueing going on.....)
In my experience the above measures should sort most such problems, but should the problem however still be there, then I would advice to look at the following url's for some further suggestions:
http://www.tomshardware.co.uk/forum/id-2813275/disk-usage-100.html