Expired

NETGEAR ReadyNAS "Access Denied"

Expired

Every now and again I get the issue where my ReadyNAS refuce access to from Windows explorer and any other file access software.

At such time, a logon screen popup on my PC, and even though I insert the correct logon credentials, I am simply rejected. A login popup might not even be expected in cases where I have set the share to "Allow Anonymous Access", but still such logon still appear.

Such can be extremely frustrating. However, in many cases the solution is quite simple. For some unknown reason, the ReadyNAS stops syncing the time with an internet server, and when out of sync, this problem occur.

The solution is therefore to access the overview page on the admin interface, and click on the clock as highlighted in the picture below.

ReadyNAS time sync

This should now open up the "Date and Time Settings"

ReadyNAS Date and Time settings

Now, select your timezone and tick the box for "Syncronize clock with an internet server". Hit Apply, and accept a reboot of your ReadyNAS.

Hopefully that should sort the problem, and you should now be able to again access your network shares.


Expired

Loss of access to ReadyNAS admin due to obsolete TLS 1.0

Expired

As I mentioned in my previous post about the Netgear ReadyNAS servers, I have been using and recommending these servers since 2008. The technology has hence been around for quite a while, and as these become older there is also popping up a few hurdles as the technology they depend on is becoming obsolete.


Up until recently Netgear has been providing regular upgrades, but many of these NAS servers have now entered EOL - End Of Life, and Netgear hence does not provide the updates required so that these can be used into the future.


Without going too much into the nitty gritty part of these servers I would personally categorise my ReadyNAS servers as follows:

ReadyNAS servers 800px1) Netgear ReadyNAS NV+

2) Netgear ReadyNAS NV+ V2


Typically the first one (NV+) is the one using the SPARC processor, and the second one (NV+ V2) is the one using the ARM processor. In the picture you can see the V1 versions at the bottom in light grey color, while the V2 versions is on top in the darker grey color.

On the specifications side there are a good few differences between these, but I am not going into those differences here as that is not relevant to this article.


ACCESS TO ADMIN INTERFACE

To access the backend admin interface for these servers you would normally use a SW called RAIDar which can be found on:

https://kb.netgear.com/20684/ReadyNAS-Downloads


You would normally launch the RAIDar software, and this will scan your network for available ReadyNAS servers.

Next, you would click to access the admin interface of the desired NAS server. The admin interface of the server should open up in your browser, and this is where the problem start as the sw on these NAS servers are no longer supported by most browsers. You therefore now simply get errormessages and cannot access the admin interface.

The reason for these error messages is that the software for these servers are requiring something called TLS 1.0, and that browsers have dropped support for these TLS versions.

As Netgear no longer is releasing firmware upgrades to enable support for TLS 1.2 means that we are not able to login to the admin interface for our Netgear ReadyNAS servers to perform any further configuration or maintenance, etc.

We are at this point only able to connect to the file shares already setup on the NAS.


TEMPORARY WORKAROUND

I have spent quite some time researching this, and as I write this article in March 2022, it is still possible to configure access to a ReadyNAS supported TLS version by configuring Firefox accordingly, and then login to your ReadyNAS admin interface using the reconfigured Firefox browser.


The workaround is quite simple:

firefox config1) Open Firefox browser

2) Enter "about:config" into the url field

3) When presented with the "Proceed with caution" warning, click "Accept the Risk and Continue"

4) In the search field simply search for "TLS"

5) At the bottom of the list there should be an option called "security.tls.version.min". Change this to "1" (to enable TLS 1.0.2)

6) Exit and restart Firefox, and you should now be able to access the Netgear ReadyNAS admin interface through Firefox. Firefox will still show a warning, but simply accept the risk and login as before.

NB! If you have another browser set as default, then RAIDar will still open the default browser, and you will still fail to access the admin interface. In such case simply copy the URL and then paste this URL into your Firefox URL field to open the admin interface in Firefox.

As mentioned in the subheading, this is a temporary workaround for Firefox, and this should work until Firefox remove support for TLS1.0 and TLS 1.1.


BETTER SOLUTION FOR THE READYNAS NV+ V2

For those that have a V2 version of the ReadyNAS, there is a better longterm solution.

When you have lost access to your admin interface you still have to start by re-enabling access to this by using the temporary workaround as mentioned above.

Next, you can download a piece of software that will update the version of the Apache web server on the ReadyNAS to version 2.2.34.
This version supports TLS v1.2 and thus will make the web interface of the ReadyNAS work with modern browsers again.

You will find this software on: https://github.com/rdynsxtrs/r5bin/tree/master/apache2

You can find descriptions on github, but to cut a long story short, simply download the file called  "Apache2_2.2.34-arm-0.0.1.bin" which you can find on the frontpage of the above URL.

After you have downloaded this file, then install this from your ReadyNAS admin interface as an "addon":

This .bin file enables TLS 1.2 and disables TLS 1.0 and 1.1 which means admin for ReadyNAS on OS 5x can be accessed from Win 11 devices.

1) Simply access the ReadyNAS interface and install this as an addon.
This installation will fail with a msg "Add-on could not be installed"

2) You will after this get a message about unable to connect to the admin interface.

3) Next, reboot the ReadyNAS manually

4) You should now be able to access the Netgear ReadyNAS interface (through RAIDars) from most modern browsers again.


I have used the above method to update 4 different V2 models with success, but I of course give no guarantees that it will work for you :)


Expired

Netgear ReadyNAS Servers

Expired

Netgear ReadyNAS 1I have for years been a big fan of NAS servers for use in home and small to medium size offices.

I personally started off with small single drive NAS servers from the likes of Maxtor and WD. I then moved on to dual-drive NAS from Iomega (for redundance), and then I moved to 4-bay NAS servers from Netgear.

I purchased my first 4-bay Netgear ReadyNAS back in 2008, and have since been using and recommending Netgear ReadyNAS devices to several people. I must have installed somewhere in the region of 20-30 such ReadyNAS servers over the years, and have been extremely happy with these throughout the last 14 years.

The reason being the stability and simplicity of managing these, as I have detailed below.


DISK FAILURES

One of the things I like the most with the Netgear ReadyNAS servers is that when a drive fails, you get a notification (if you configured such alerts), and can then without turning off the server swap the faulty drive with a new drive, and viola, after a few hours, the system is redundant again. This simplicity alone is not the case with many of the NAS systems out there, and trust me, disks will fail !!.


DISK UPGRADES

Another easy task is when it comes to disk upgrades.

If I e.g. have 4 x 2TB harddisks in such a 4-bay ReadyNAS v2 X-Raid system, I would get a total capacity of 3 of the 4 drives (with a small overhead). So in this case the total storage would be around 5.43TB with 4 x 2TB harddrives. (ReadyNAS have a great "RAID Calculator" that will allow you to calculate various configurations: https://rdconfigurator.netgear.com/raid/index.html)

Now, 5.43TB as in this case might not be a lot, and depending on your usage, you might after a while get a need for more space.

Maybe you next would like to upgrade to 4 x 4TB drives that will give you a total redundant capacity of 10.9TB. (An increase of over 5TB of redundant storage).

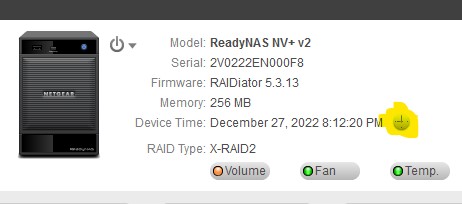
Please note that the NV+ has a total capacity of 4 x 2TB, while the capacity on a NV+v2 is 4 x 4TB disks.

The upgradeprocedure in such scenario is quite easy:

1) You simply pull out the caddy for the first of the 2TB disk, and then replace this with the new 4TB disk. When you then insert the caddy, the system will then start off by initializing the new disk (format this), and then sync up with the other 3 disks. (still only recognising this new 4TB disk as a replacement for the 2TB disk and utilising only 2TB of the disk). You will hence at this point not see any increase in available storage capacity. Typically it might take about 24 hours to finalise such a disk replacement (a bit depending on the amount of data stored on your NAS).

During such disk replacement process you will get the following emailalerts:

a) Disk Removal detected

b) New Disk detected

c) Disk initialization started

d) Disk initialization successfully finished

e) RAID event detected (RAID sync started)

f) RAID sync finished. The volume is now fully redundant.


When you get the "RAID sync finished" notification, the NAS is again stable, and only at this point can you go on and replace the next disk. You then follow the above procedure until all 4 disks are replaced and RAID sync has finialised.

When all 4 disks have been upgraded to the new 4TB disks (as in my example), you will get yet another alert:


g) Your system will now begin online expansion

The system now recognises that all drives have been replaced, and that there is a scope for expanding the available storage to make use of the larger hard disks.

Finally you will get the last alert:


h) Data volume has been successfully expanded

At this point the NAS has expanded the available storage to match your new upgraded hard disks.


NB!

If I recall correctly, there is some strange limit on auto expanding that you can max expand to 8TB more than the FIRST original setup of that drive. In other words, if you originally had 4x250GB disks in your system, then you would have had a total capacity of roughly 0.7TB in an X-RAID. If you then later on find that you install 4 x 4TB drives, which in theory should give you a total of 10.9TB, then you might find that you only get a total of 8.7TB due to that strange autoexpand limit. The only way around this is to factory reset the ReadyNAS, which would free up all 10.9TB. 


Despite this strange limit, I found that this has been fairly very well planned by Netgear, and have made my life easy when it comes to maintaining these NAS servers over the last 14 years.


Other Recommendations

- I always connect my NAS drives to UPS battery backups, and also ensure that they are connected to a surge protection power strip unless that is a part of the UPS.

- I have never experienced a failure of a ReadyNAS other than a simple case of that the internal power supply in my very first ReadyNAS recently "died" after 14 years of service. Replacing these is quite easy, and could be reasoable priced if you purchase a standard small powersupply and modify that. (I might cover that procedure in another post at some time.)

Other than that these have worked extremely well for me with minimum problems over the years.


Things NOT to do with a ReadyNAS server:

- Never remove more than one drive at a time.

- Always wait for the process to finalize before you move on to the next drive.

- You CANNOT downgrade the volume by changing to smaller drives on the NAS (you will then have to factory reset this.

- Even though the drives are "hot swappable" dont use this as a "party trick" to demonstrate to your friends. All in all, you make the NAS non redundant until it has synced back up, and that is always a risk.


And a final recommendation is that you keep a spare disk available for when you get a disk failure. Trust me, you will over time experience such as the NAS is running all year and clock up a fair few hours of runtime.
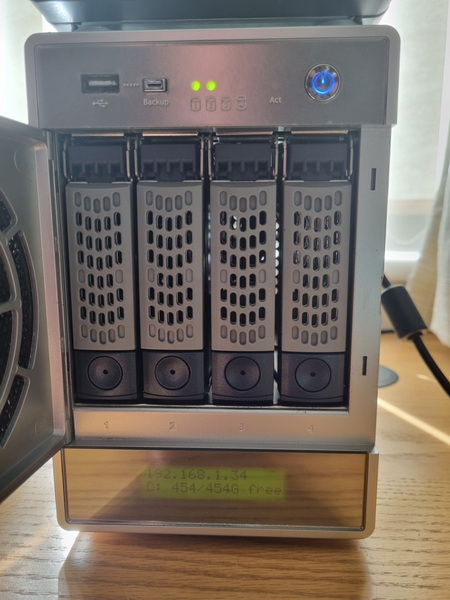
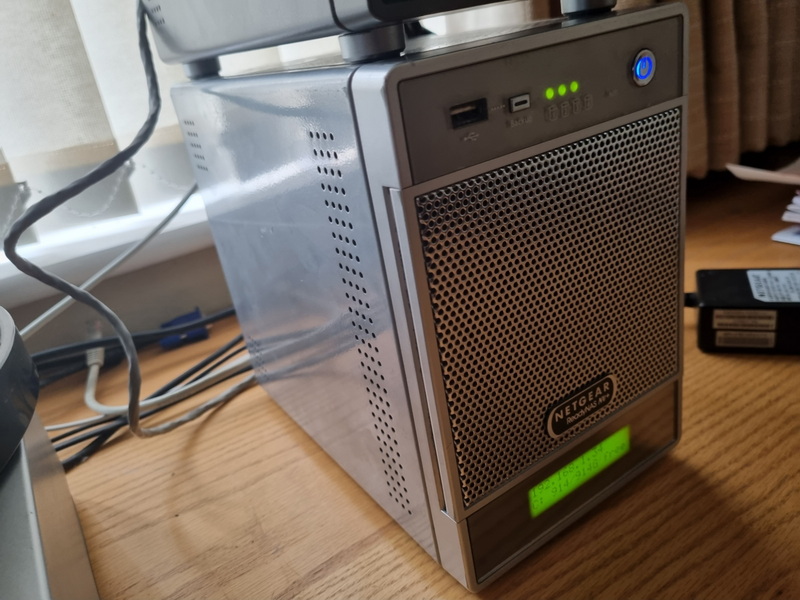
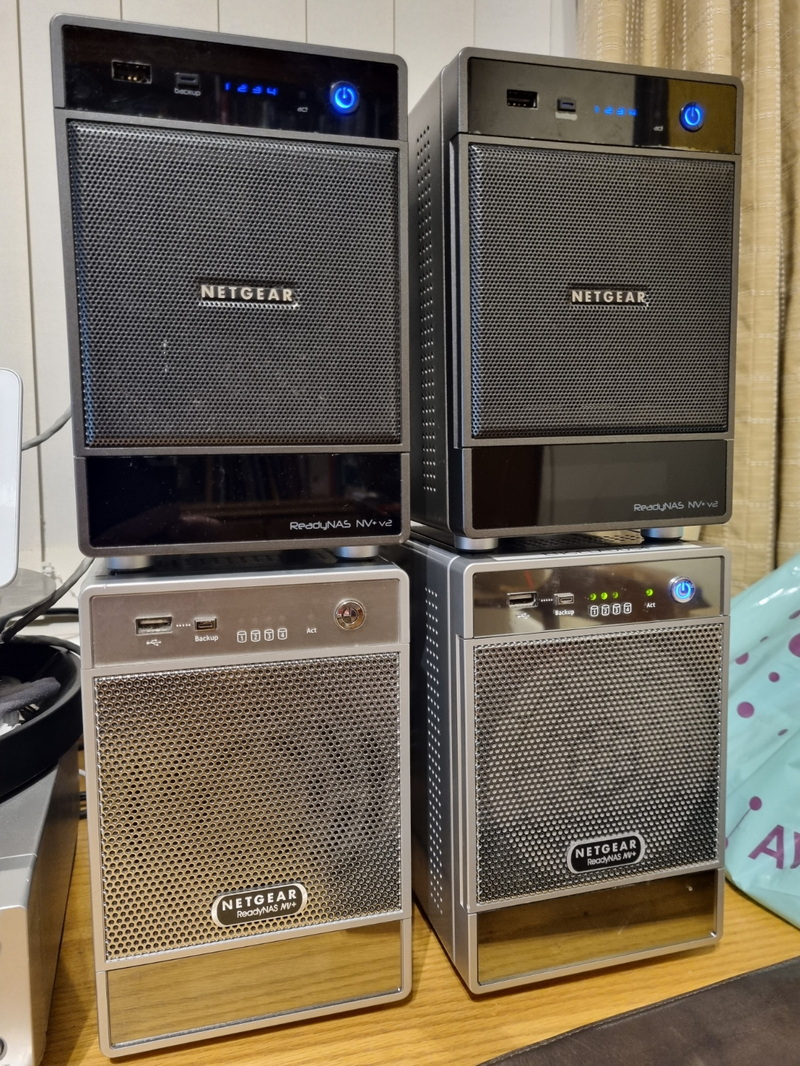
Netgear ReadyNAS 2

Expired

Problems configuring iot through your App -Example Adax Wifi heaters

Expired

adax neo wifi smart electric radiator ebay iconsToday you can purchase a lot of different devices that fall under the category "Internet of Things". Examples hereunder are camerasystems, heatingsystems, internet mesh systems, audiosystems, and so on.

The idea is often that you configure these devices via an App on your smartphone and you start by installing the App on your mobile, and follow the instructions, and viola, it should all be working, right ?

In my experience configuring such iot devices might not always be as straight forward as described in the little leaflet, which can be quite frustrating.

I have several times ran into problems where the installation of the App goes well, and I am allowed to begin the configuration just to experience that the Phone App hangs or crashes midway through the installation.


So, what causes this problem, and how do I get around it ?


In my experience, most times I have got into problems during this installation phase have been caused by the same problem which I will describe below.


As an example I will use the installation and configuration of ADAX Neo WIFI panel heaters.

When I have installed the Adax App and created an account on my phone  (in my case an Android Phone) I want to start adding each device to this account.

  • Typically I then turn on the new device and it enter into configuration mode by default.
  • I then in the phoneapp go to "ADD DEVICE".
  • The new Adax device will (while in the configuration mode) create its own WIFI network which the phone automatically finds and connect to. (The SSID/Network name would be something like: SH-ADAX-XXXXX).
  • The Phone App is now connected to the device and are able to configure this heater.
  • I then follow the instructions, and the App configure the new device with the wifi settings of my internet network, and name of this heater, and finally set it into operational mode beside the other heaters (if any) under the same account. At this point the Adax heater will disable its own wifi network, and connect to your main WIFI network.


In my experience the following events take place:

  1. My phone does connect to the new Adax heaters wifi network as expected.
  2. While I am in the process of configuring the new device, my phone detect that my Adax heater does not give the phone access to the internet.
  3. My phone then midway through the configuration disconnect from the Adax heaters WIFI, and reconnect to my home WIFI which has internet access.
  4. As a result the App have lost connection to the Adax heater before it has finished the configuration, and hence the application fails, hangs or crashes.
  5. The Adax heater has been left in limbo, and has not connected to my home network, furthermore it is no longer in default configuration mode.


WHY DOES THE PHONE DO THIS?

The phone wrongly assume that you always want access to the internet, and therefore connect to what it believe is a "better" WIFI network.


SO, WHAT DO I DO TO GET AROUND THIS?

Before I start adding a new Adax heater I simply "forget" all other wifi networks in my home. Hence the phone has not got any other networks to change to.

Now the phone will stay on the Adax heater configuration network, and will complete the configuration undisturbed. At some time during this configuration the App will ask for the accesscode for your home network. As soon as you enter that code, then the Adax heater (and your phone) will connect to your home network and the configuration will complete.


If I want to install yet another Adax device, I will therefore again have to first "forget" my other WIFI networks. Unfortunately I will have to do this before every new device I add.


HOW TO FACTORY RESET THE ADAX HEATER

If you got to the point that the App crashed or was hanging midway through the installation/configuration, then you will have to look up how to factory reset your Adax heater so as to get this device back into configuration mode. Otherwise you will not be able to connect this to your app.

Factory reset of Adax Neo WIFI panel heaters can be done as follows:

  • Hold “+” “-” and “ok” until the display flashes with “rE” with a quick flash and then displays 20 degrees in the display.
  • You can verify that the device is in configuration mode by checking that there is a wifi network available with a name like "SH-ADAX-XXXXX" or similar.


More info on Adax WIFI enabled devices:

Adax Wifi guide: https://adax-solaire.co.uk/manuals/AdaxWiFiGuide.pdf

For more info on Adax Panel heaters: https://adax.no/en/wi-fi/


FINAL THOUGHTS:

Unfortunately I have experienced this problem on many different IOT systems from different vendors such as Netgear, Linksys, and others, so this problem is not unique to Adax, and does not give any indication on the quality of their products.

I have since 2018 been using close to 20 Adax heaters in two different homes and are very happy with them so far.

Expired

Black screen, spinning wheel when reboot

Expired

I suddenly started getting a strange problem on my Windows 10 desktop computer.

Often after an update/upgrade, you are asked to reboot the computer to finish the update/upgrade.

When I then go ahead and initiate the reboot the computer then hang on the restart with a black screen and that little spinning wheel

2020 11 10 loading screen.circle

After a lot of grief I found that this was caused by an external USB device.

I do use a Logitech Cordless Mouse, and the USB adapter for this was causing the problem.

Simply unplug the usb adapter for the mouse, and viola my computer continued the boot cycle.


I will have to look deeper into this to see if there is a workaround so I dont have to unplug this everytime I reboot the computer, but for the time being this is a workable solution.


Funnily enough, this problem only happen when I reboot the computer. If I turn off the computer, and then turn it on again, then the computer does not hang on boot.

Expired

Approval of an article in Joomla prior to publishing this

Expired

Occationally when I add a new article to a customers Joomla website I want to be able to let my customer approve this article prior to publishing this.

As there are no obvious workflow for sending an article for approval to a non-registered user, I needed to find a way to solve this.

You can achieve this as follows:

1) Write your article, and set the "status" to archived

2) Look at the url in the browser and the articleID should be at the very end of the url. (Alternatively, you can find the articleID in the CONTENT-ARTICLES within Joomla Admin)

3) ReCreate your unique URL

The URL should have the following form: https://demo.jodp.net/index.php?option=com_content&view=article&id=[31]

(tailor your url accordingly. In the above example you can see that the article ID is "31", and my demosite is on the url "https://demo.jodp.net")